In this beginner’s guide, we’ll take you through everything you need to know about how to use shutter speed in photography. From the basics of how it works to advanced techniques, we’ll show you how to take your photography skills to the next level.
Photography is the art of capturing moments that are worth cherishing. With the advent of technology, anyone can take a picture, but only a few can capture stunning photographs. One of the most crucial aspects of photography is mastering shutter speed. Shutter speed is the amount of time the camera’s shutter remains open, allowing light to enter and capture the image. Understanding how to use it effectively can make all the difference in the quality of your photographs.
- What is shutter speed in photography?
- How does shutter speed affect your photographs?
- Understanding the shutter speed scale and settings
- Basic techniques for using shutter speed
- Advanced techniques for using shutter speed in photography
- Shutter speed and motion – freezing or blurring movement
- Shutter speed in photography and exposure – how to balance shutter speed with aperture and ISO
- Common mistakes to avoid when using shutter speed
- Tips for mastering shutter speed
- Conclusion – how mastering shutter speed can take your photography to the next level
Whether you’re a professional photographer or just starting, learning how to master shutter speed will help you take truly amazing photographs. So grab your camera, and let’s get started on this exciting journey of capturing stunning photographs!
What is shutter speed in photography?
Shutter speed is one of the three elements of exposure in photography, along with aperture and ISO. It refers to the amount of time the camera’s shutter remains open when taking a photograph. The longer the shutter stays open, the more light enters the camera, and the brighter the image will be. Conversely, the shorter the shutter speed, the less light will enter the camera, and the darker the image will be.
Shutter speed is measured in seconds or fractions of a second. For example, if you set your camera to a shutter speed of 1/100, the shutter will remain open for one-hundredth of a second. In contrast, if you set your camera to a shutter speed of 1 second, the shutter will remain open for a full second.
It’s important to note that shutter speed is not an isolated setting. It is closely related to aperture and ISO, and adjusting one setting will affect the other two.
How does shutter speed affect your photographs?
Shutter speed affects your photographs in two primary ways: motion and exposure.
Motion
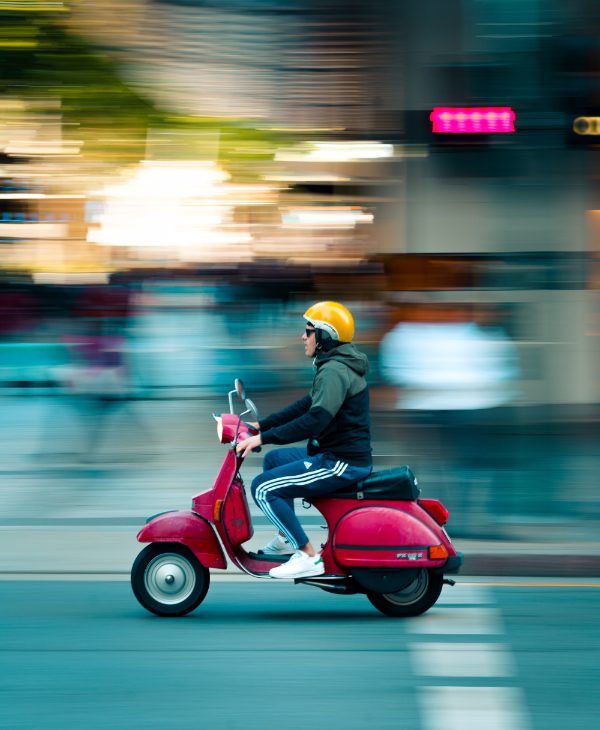
Shutter speed determines how motion is captured in a photograph. A fast shutter speed will freeze fast-moving objects, while a slow shutter speed will create motion blur. For example, if you’re photographing a moving car, a fast shutter speed will freeze the car in place, while a slow shutter speed will create a sense of motion blur, showing the car’s movement.
Exposure
Shutter speed also affects exposure, which is the overall brightness of a photograph. The longer the shutter stays open, the more light enters the camera, and the brighter the image will be. Conversely, the shorter the shutter speed, the less light will enter the camera, and the darker the image will be.
Understanding the shutter speed scale and settings
Before we dive into the techniques for using shutter speed, let’s take a closer look at the shutter speed scale and settings.
The shutter speed scale ranges from a fraction of a second to several seconds or more. The most common shutter speeds are 1/1000, 1/500, 1/250, 1/125, 1/60, 1/30, 1/15, 1/8, 1/4, 1/2, and 1 second.
In addition to these standard shutter speeds, most cameras also offer a range of intermediate shutter speeds, such as 1/200, 1/400, and 1/800. Some cameras also offer a bulb mode, which allows you to keep the shutter open for an extended period, such as several minutes or more.
When adjusting your camera’s shutter speed, you’ll typically use either manual or semi-automatic mode. In manual mode, you have full control over the shutter speed, aperture, and ISO. In semi-automatic mode, such as aperture priority or shutter priority, you control one setting, and the camera automatically adjusts the other two to maintain proper exposure.
Basic techniques for using shutter speed
Now that you understand the basics of shutter speed, let’s dive into some techniques for using it effectively.
1. Freeze motion with a fast shutter speed
One of the most common uses of shutter speed is to freeze motion. If you’re photographing a fast-moving subject, such as a bird in flight or a sports player, you’ll want to use a fast shutter speed to freeze the action.
A good starting point is to use a shutter speed of 1/1000 or faster. However, the exact speed you’ll need will depend on the speed of the subject and the amount of light available. If you’re shooting in low light, you may need to increase your ISO or use a wider aperture to maintain a fast shutter speed.
2. Create motion blur with a slow shutter speed
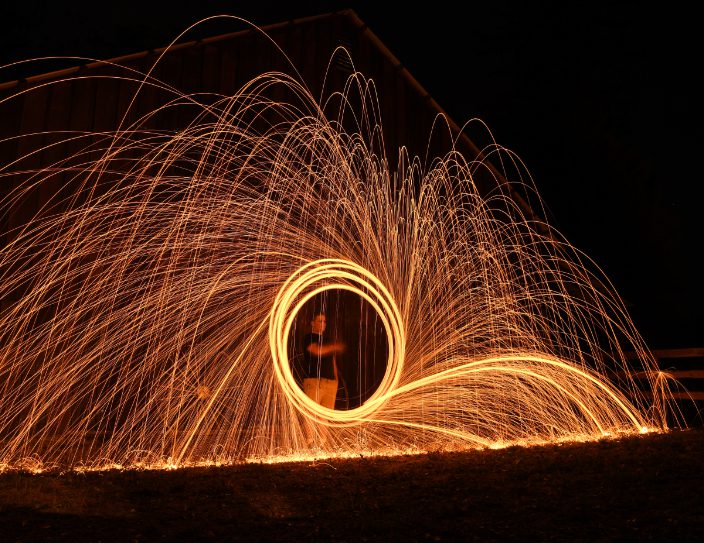
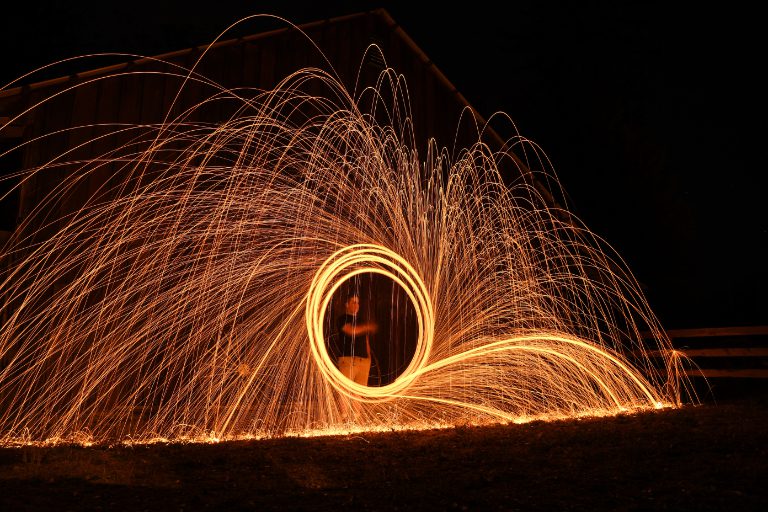
While freezing motion is a common use of shutter speed, slowing down the shutter can also create beautiful motion blur. This technique is particularly effective for capturing flowing water or moving lights.
To create motion blur, use a shutter speed of 1/15 or slower. To avoid camera shake, you’ll need to use a tripod or stabilize your camera in some other way. Alternatively, you can pan your camera along with the moving subject to create a sense of motion while keeping the subject in focus.
3. Use shutter speed in photography to control depth of field
Shutter speed can also be used to control the depth of field in your photographs. Depth of field refers to the range of distance that is in focus in a photograph. A wide depth of field means that everything in the image is in focus, while a shallow depth of field means that only a small portion of the image is in focus.
To create a shallow depth of field, use a wide aperture, such as f/2.8, and a fast shutter speed. To create a wider depth of field, use a narrower aperture, such as f/11 or f/16, and a slower shutter speed.
4. Use shutter speed in photography to create intentional camera shake
Intentional camera shake is a technique that can add a sense of artistic flair to your photographs. To create intentional camera shake, use a handheld camera and a slow shutter speed, such as 1/4 or 1/2. Move the camera in a deliberate, controlled way while taking the photograph. Experiment with different movements, such as up and down, side to side, or circular motion.
Advanced techniques for using shutter speed in photography
Now that you’ve mastered the basic techniques for using shutter speed, let’s explore some more advanced techniques.

1. Zooming while taking a photograph
Zooming while taking a photograph can create a sense of motion and depth in your photographs. To use this technique, set your camera to a slow shutter speed, such as 1/15 or slower. Zoom in or out while taking the photograph, keeping the camera steady. This technique works particularly well for landscapes and cityscapes.
2. Panning
Panning is a technique that involves following a moving subject with your camera while taking a photograph. This creates a sense of motion in the photograph while keeping the subject in focus. To use this technique, set your camera to a slow shutter speed, such as 1/15 or slower. Follow the subject with your camera, moving it in the same direction as the subject. This technique works particularly well for sports and wildlife photography.
3. Rear curtain sync
Rear curtain sync is a technique that involves using a slow shutter speed and a flash to create a sense of motion. To use this technique, set your camera to a slow shutter speed, such as 1/15 or slower. Set your flash to rear curtain sync mode, which means that the flash will fire just before the shutter closes. This will freeze the subject and create a light trail behind it, showing the motion.
Shutter speed and motion – freezing or blurring movement
As we’ve mentioned, shutter speed has a significant impact on how motion is captured in your photographs. A fast shutter speed will freeze motion, while a slow shutter speed will create motion blur.

When deciding how to use shutter speed to capture motion, consider the speed of the subject and the effect you want to create. If you’re photographing a fast-moving subject, such as a bird in flight, you’ll want to use a fast shutter speed to freeze the action. On the other hand, if you’re photographing flowing water or moving lights, you’ll want to use a slow shutter speed to create motion blur.
Shutter speed in photography and exposure – how to balance shutter speed with aperture and ISO
Shutter speed is just one element of exposure in photography, along with aperture and ISO. To get a properly exposed photograph, you’ll need to balance all three elements.
A fast shutter speed will reduce the amount of light that enters the camera, which means you’ll need to use a wider aperture or a higher ISO to maintain proper exposure. Conversely, a slow shutter speed will increase the amount of light that enters the camera, which means you may need to use a narrower aperture or a lower ISO to maintain proper exposure.
When adjusting your camera’s settings for proper exposure, there’s no one-size-fits-all solution. You’ll need to experiment with different combinations of shutter speed, aperture, and ISO to find the right balance for your particular situation.
Common mistakes to avoid when using shutter speed
When using shutter speed, there are a few common mistakes to avoid:
1. Camera shake
Using a slow shutter speed can lead to camera shake, which can result in blurry photographs. To avoid camera shake, use a tripod or stabilize your camera in some other way.
2. Overexposure or underexposure
Using the wrong shutter speed can result in overexposed or underexposed photographs. To ensure proper exposure, use a light meter or check the histogram on your camera to monitor the exposure level.
3. Inconsistent shutter speed
Using inconsistent shutter speeds can lead to uneven exposure and blurry photographs. To ensure consistent shutter speeds, use a tripod or stabilize your camera in some other way.

Tips for mastering shutter speed
Now that you understand the basics of shutter speed and the techniques for using it effectively, here are a few tips for mastering shutter speed:
1. Practice, practice, practice
The more you practice using shutter speed, the more comfortable you’ll become with adjusting your camera’s settings and capturing the perfect shot.
2. Use a tripod or stabilize your camera
When using a slow shutter speed, use a tripod or stabilize your camera in some other way to avoid camera shake.
3. Experiment with different shutter speeds
Experiment with different shutter speeds to see how they affect your photographs. Try freezing motion with a fast shutter speed, creating motion blur with a slow shutter speed, and everything in between.
4. Use the right shutter speed for the subject
When capturing motion, use a fast shutter speed to freeze action and a slow shutter speed to create motion blur.
5. Focus on composition
Remember that shutter speed is just one element of photography. Focus on composition, lighting, and other elements to create truly stunning photographs.
Conclusion – how mastering shutter speed can take your photography to the next level
Shutter speed is one of the most important elements of exposure in photography, and mastering it can make all the difference in the quality of your photographs. By understanding how shutter speed works and practicing the techniques we’ve outlined, you can take your photography skills to the next level.
Whether you’re a professional photographer or just starting, learning how to master shutter speed will help you capture truly amazing photographs. So grab your camera, experiment with different shutter speeds, and start capturing stunning photographs today!