Capturing a moving subject while keeping the background blurred can result in stunning images that truly capture the energy and motion of a moment. However, mastering this technique is not always easy. In this article, I will share with you my tips and tricks for how to do panning photography.
- Introduction to Panning Photography
- Understanding the Basics of Panning Photography
- Camera Settings for Panning Photography
- Choosing the Right Lens for Panning Photography
- Tips and Tricks for Perfecting Panning Photography
- Common Mistakes to Avoid in Panning Photography
- Conclusion: Mastering the Art of Panning Photography
Introduction to Panning Photography
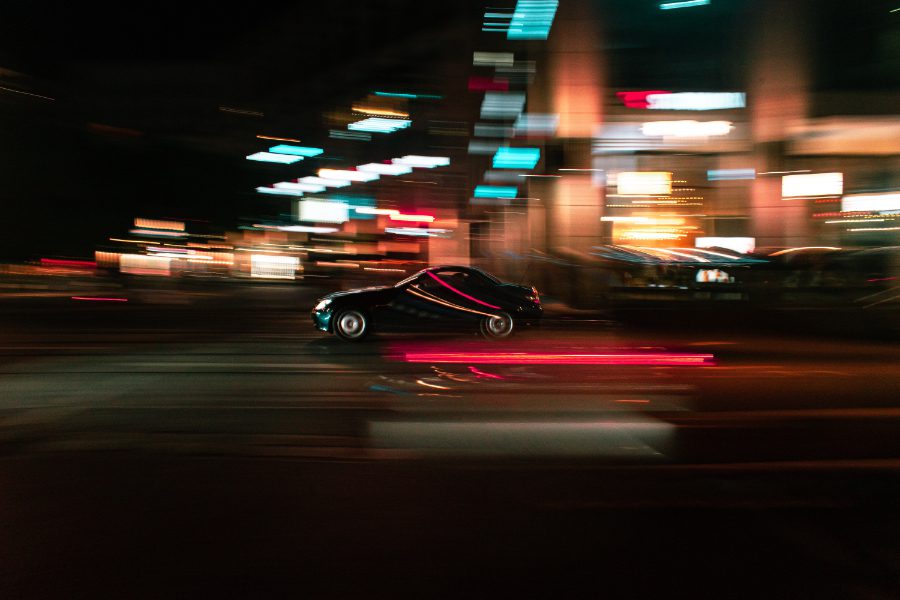
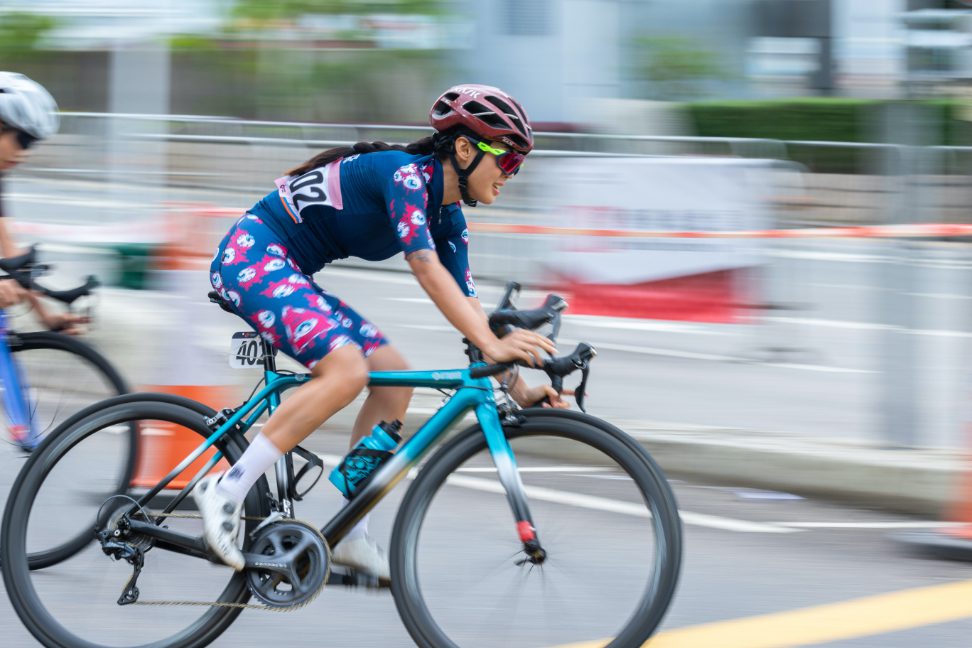
Panning photography involves following a moving subject with your camera while using a slow shutter speed to create a motion blur effect in the background. This technique is commonly used in sports, wildlife, and street photography to capture dynamic and fast-paced scenes. With panning photography, you can convey a sense of motion and speed, as well as freeze the subject in sharp focus.
Understanding the Basics of Panning Photography
Before you start practicing panning photography, it is important to understand the basic principles behind the technique.
- Firstly, you need to choose a subject that is moving across your field of vision.
- Secondly, you need to follow the subject smoothly and steadily with your camera as it moves.
- Finally, you need to use a slow shutter speed to create the motion blur effect in the background.
To achieve a steady panning motion, it is important to stand with your feet shoulder-width apart and keep your upper body still while moving your camera. You can also use a tripod to stabilize your camera and make it easier to follow the subject. Additionally, it is important to shoot in burst mode to increase your chances of capturing the perfect shot.
Camera Settings for Panning Photography
When it comes to camera settings for panning photography, there are a few key considerations.
- You need to use a slow shutter speed to create the motion blur effect in the background. The exact shutter speed will depend on the speed of your subject and the lighting conditions, but a good starting point is around 1/30th of a second.
- Choose the right aperture to ensure that your subject is in sharp focus. A wide aperture (low f-stop number) will create a shallow depth of field, which can help to isolate your subject from the background. However, this can also make it more difficult to keep your subject in focus as it moves.
- Set your ISO to ensure that your exposure is correct. In low light conditions, you may need to increase your ISO to allow for a slower shutter speed. However, be careful not to increase your ISO too much, as this can result in image noise.
Choosing the Right Lens for Panning Photography
The first thing to consider when choosing a lens for panning photography is the focal length. A lens with a longer focal length, such as a telephoto lens, will magnify the subject, making it appear closer and larger in the frame. This can be useful when photographing fast-moving subjects such as cars or animals. However, a longer focal length also means that the depth of field will be shallower, making it harder to keep the subject in focus while panning.
On the other hand, a lens with a shorter focal length, such as a wide-angle lens, will capture more of the surrounding environment in the frame. This can be useful when photographing subjects that are moving in a scenic location, such as a cyclist on a winding road. A wider lens also means that the subject will appear smaller in the frame, and it may be harder to keep it in focus while panning.
Another important factor to consider when choosing a lens for panning photography is the aperture. A wide aperture, such as f/2.8 or wider, will allow more light to enter the lens, making it easier to capture sharp images in low light conditions. A wider aperture also means that the depth of field will be shallower, making it harder to keep the subject in focus while panning.
It’s important to choose a lens with image stabilization, especially if you’re using a longer focal length. Image stabilization helps to reduce camera shake, making it easier to keep the subject in focus while panning. Some lenses also have special modes for panning photography, which can help to further stabilize the image.
Tips and Tricks for Perfecting Panning Photography
To perfect your panning photography skills, it is important to practice regularly and experiment with different settings and techniques. Here are a few tips and tricks to help you get started:
- Start with slow-moving subjects, such as people walking, before moving on to faster subjects like cars or wildlife.
- Use the focus tracking feature on your camera to keep your subject in focus as it moves.
- Anticipate the movement of your subject and start panning before you take the shot.
- Use a neutral density filter to reduce the amount of light entering your lens, allowing you to use a slower shutter speed in bright conditions.
- Experiment with different angles and perspectives to create more interesting and dynamic shots.

Common Mistakes to Avoid in Panning Photography
There are a few common mistakes that photographers make when attempting panning photography. These include:
- Moving the camera too quickly, resulting in a blurry subject.
- Focusing on the background instead of the subject.
- Using a shutter speed that is too fast, resulting in a frozen background.
- Not using burst mode to increase your chances of capturing the perfect shot.
Conclusion: Mastering the Art of Panning Photography
Panning photography can be a challenging technique to master, but with practice and patience, you can capture stunning images that truly capture the motion and energy of a moment.
By understanding the basic principles behind panning photography, choosing the right equipment and settings, and experimenting with different techniques, you can take your photography to the next level. So, grab your camera and get out there – the perfect shot is waiting for you!