- What is a Megapixel in Camera?
- Common Misconceptions About Megapixels and Print Quality
- How Many Megapixels Do You Need for Different Print Sizes?
- Choosing the Right Camera for Your Printing Needs
- Best Budget Camera for Small Prints
- Best Camera for Large Prints
- Tips for Getting High-Quality Prints from Your Camera
- How to Export Photos for Print
- Resampling
- How to Resample a Photo in Photoshop?
- What Export is Best for Printing Photos?
- What is The Best File Size for Printing Photos?
What is a Megapixel in Camera?
In the world of photography, the term “megapixel” has become a common buzzword. But what exactly is a megapixel in camera?
A megapixel is a unit of measurement used to describe the resolution of a digital image. It stands for “million pixels” and refers to the number of tiny dots that make up a digital image. The more megapixels a camera has, the higher the resolution of the images it produces.
To put it simply, a camera’s megapixel count is a measure of how many pixels its image sensor can capture. Each pixel in an image sensor captures a tiny amount of light, which is then processed and combined with other pixels to create a complete image.
The more pixels a sensor has, the more detail it can capture, resulting in a higher-quality image.
Common Misconceptions About Megapixels and Print Quality
There are several common misconceptions about megapixels and print quality that continue to persist in the world of digital photography.
One of the most prevalent is the belief that the more megapixels a camera has, the better the print quality will be. However, this is not always the case. While it is true that a higher megapixel count can result in sharper images, there are many other factors that can impact print quality, including the quality of the lens, the size of the sensor, and the processing algorithms used by the camera.
Another common misconception is that higher megapixels are always better, regardless of the intended use for the image. For example, a photographer who primarily shoots for social media and web-based platforms may not need as many megapixels as someone who prints large-format images for gallery exhibitions.
In fact, higher megapixel counts can actually be a hindrance for web-based images, as they can slow down load times and take up more storage space. It is also important to remember that print quality is not solely determined by megapixels.
Another misconception about megapixels and print quality is that more megapixels always means better image quality in general. However, this is not necessarily true. Megapixels only refer to the number of pixels in an image, not the quality of those pixels.
A camera with a high megapixel count but poor dynamic range, color accuracy, or low-light performance may produce lower-quality images than a camera with a lower megapixel count but superior image processing capabilities.
Furthermore, many people believe that the resolution of a monitor or screen determines print quality. However, the resolution of a monitor only affects the display of an image, not the final print quality.
It is essential to understand the difference between display resolution and print resolution. A high-resolution monitor will display an image with clarity, but it does not necessarily mean that the image will print with the same clarity and detail.
How Many Megapixels Do You Need for Different Print Sizes?
To answer this question, we need to understand the relationship between megapixels and print resolution. The resolution of a print is measured in dots per inch (dpi), and the higher the dpi, the more detail and sharpness the print will have.
As a general rule, you’ll want a minimum of 300 dpi for a high-quality print, which means that you’ll need a certain number of megapixels to achieve this level of resolution.
4×6 inch print
For a 4×6 inch print, you’ll need a minimum of 2 megapixels. This is because a 4×6 print only requires a resolution of 300 dpi, which can be achieved with 2 megapixels. If you have a camera with 4 or 5 megapixels, you’ll have more than enough resolution to produce high-quality 4×6 prints.
8×10 inch print
For an 8×10 inch print, you’ll need a minimum of 8 megapixels. This is because an 8×10 print requires a resolution of 300 dpi, and you’ll need 8 megapixels to achieve this level of detail. If you have a camera with 10-12 megapixels, you’ll be able to produce stunning 8×10 prints that are sharp and detailed.
16×20 inch print
For a 16×20 inch print, you’ll need a minimum of 24 megapixels. This is because a 16×20 print requires a resolution of 300 dpi, and you’ll need 24 megapixels to achieve this level of detail. If you have a camera with 30 or more megapixels, you’ll be able to produce stunning 16×20 prints that are incredibly detailed and sharp.
24×36 inch print
If you want to print a poster-sized photograph, say 24×36 inches, you will need a minimum of 16 megapixels. This is because the image needs to be blown up to a much larger size, and a higher resolution is necessary to maintain the sharpness and clarity of the image. Anything less than 16 megapixels will result in a blurry and pixelated print.
It’s worth noting that these are just guidelines, and the actual number of megapixels you need will depend on a variety of factors, including the quality of your camera’s sensor and the level of detail in your photos.
However, by following these guidelines, you can ensure that you have enough megapixels to produce high-quality prints at different sizes.
Choosing the Right Camera for Your Printing Needs
Choosing the right camera for your printing needs can be a daunting task, especially if you’re not familiar with the different types of cameras available in the market. With so many options to choose from, it’s essential to understand what features are necessary for capturing high-quality photos that will look great when printed.
1. Resolution
The first thing you need to consider when choosing a camera for printing is the resolution. The higher the resolution of the camera, the more detail it can capture, allowing you to print larger images without losing quality.
A camera with at least 12-megapixel resolution is recommended for printing standard-sized photos up to 8×10 inches. However, if you plan on printing larger images, you’ll need a camera with a higher resolution.
2. Sensor
Another essential factor to consider when selecting a camera for printing is the type of sensor it uses. The two most common types of sensors are CMOS and CCD.
CMOS sensors are generally faster and consume less power, making them ideal for shooting videos. On the other hand, CCD sensors provide better image quality, especially in low light conditions, making them more suitable for printing purposes.
3. ISO
If you plan on printing photos in different lighting conditions, it is important to consider the camera’s ISO range. A higher ISO range will allow you to take photos in low-light situations without sacrificing image quality. However, be aware that higher ISO settings can also introduce noise into your photos.
4. Lens
The lens is another critical component to consider when choosing a camera for printing. A high-quality lens will ensure that you capture sharp, clear images with accurate colors and contrast. Look for lenses with a low f-stop value, as they allow more light to enter the camera, resulting in better image quality.
Additionally, consider the zoom range of the lens, as this will determine the flexibility of the camera in capturing different types of images. When selecting a camera for printing purposes, it’s also essential to consider its connectivity options.
5. Type of Camera
A point-and-shoot camera is a good choice for casual photographers who want a simple, easy-to-use camera that produces good-quality images. However, if you are looking for more control over your photos and want to experiment with different settings, a DSLR camera may be a better choice.
Ideally, you want a camera that allows you to transfer images to your computer or printer easily. Look for cameras with Wi-Fi or Bluetooth connectivity, as they allow you to transfer images wirelessly, eliminating the need for cables and card readers.
6. Budget
Professional-grade cameras can be quite expensive, but there are also budget-friendly options available in the market. However, it’s important to keep in mind that a higher price doesn’t always equate to better quality. It’s essential to do your research and read reviews to ensure that you are getting the best value for your money.
Best Budget Camera for Small Prints
The best and cheap camera for small prints that are perfect for budget-conscious individuals.
1. Nikon Coolpix A10
If you’re looking for a more affordable option, the Nikon Coolpix A10 is a great choice. It is a simple point-and-shoot camera that is perfect for beginners. The camera has a 16.1-megapixel CCD sensor that captures decent images and videos.
It also has a 5x optical zoom lens that allows you to get closer to your subject. The Nikon Coolpix A10 is lightweight and compact, making it easy to carry around. It also has a variety of shooting modes and creative effects that allow you to personalize your photos.

2. Canon PowerShot SX620 HS
One of the best and cheap cameras for small prints is the Canon PowerShot SX620 HS. It is a compact camera that is perfect for travel and everyday use. It has a 20.2-megapixel CMOS sensor that captures high-quality images and videos.
The camera also has a 25x optical zoom lens that allows you to get up close and personal with your subject. The Canon PowerShot SX620 HS also has built-in Wi-Fi and NFC connectivity, making it easy to transfer your photos and videos to your smartphone or tablet.

3. Sony Cyber-shot DSC-HX400V
Another great option for those looking for a budget-friendly camera that can produce small prints is the Sony Cyber-shot DSC-HX400V. This camera is perfect for those who love wildlife and landscape photography. It has a 20.4-megapixel Exmor R CMOS sensor that captures stunning images and videos.
The camera also has a 50x optical zoom lens that allows you to capture distant subjects with ease. The Sony Cyber-shot DSC-HX400V also has built-in Wi-Fi and NFC connectivity, making it easy to transfer your photos and videos to your smartphone or tablet.

Best Camera for Large Prints
The best camera for large prints needs to have a high resolution and image quality to ensure that the final product looks crisp and clear.
1. Nikon D850
One of the best cameras for large prints is the Nikon D850. With a whopping 45.7 megapixel sensor, this camera produces images with incredible detail and sharpness. It also has a wide dynamic range, which means that it can capture a wide range of tones, from the darkest shadows to the brightest highlights.
This makes it ideal for landscape and nature photography, where capturing the full range of colors and textures is crucial.

2. Canon EOS 5DS R
Another great option is the Canon EOS 5DS R. This camera features a 50.6 megapixel sensor, making it one of the highest resolution cameras on the market. It also has a low-pass filter cancelation feature, which allows for even sharper images with more detail. The EOS 5DS R is perfect for photographers who want to capture every detail of their subject, whether it’s a landscape, portrait, or still life.

3. Sony Alpha A7R IV
For those who prefer mirrorless cameras, the Sony Alpha A7R IV is an excellent choice. With a 61 megapixel sensor, it is one of the highest resolution mirrorless cameras available. It also has an advanced autofocus system, which makes it easy to capture sharp images of moving subjects. The Alpha A7R IV is perfect for photographers who want the portability of a mirrorless camera without sacrificing image quality.

Tips for Getting High-Quality Prints from Your Camera
As a photographer, printing your work can be the ultimate reward for all the hard work and dedication you’ve put into capturing that perfect shot.
However, getting high-quality prints from your camera can be a bit of a challenge, especially if you’re not familiar with the process. Fortunately, there are several tips that you can use to ensure that your prints are of the highest quality possible.
One of the most important tips for getting high-quality prints from your cam is to make sure that your camera settings are optimized for printing. This means that you should choose a high resolution and high-quality setting when taking your photos. This will ensure that your images are sharp and detailed, even when printed at large sizes.
Make sure that your white balance, contrast, and exposure are all set correctly. This will help to ensure that your prints are true to life and look as good as possible.
Use high-quality printing materials. This includes using high-quality photo paper, ink, and printers. Investing in a high-quality printer and paper may seem like a costly expense at first, but it will pay off in the long run when you’re able to produce professional-quality prints that you can be proud of.
You should also make sure that your printer is properly calibrated so that it can produce accurate colors and tones.
Finally, it’s important to remember that the environment in which you print your photos can also have a significant impact on their quality. For example, printing in a room with poor lighting or high humidity can result in prints that are grainy or discolored. To avoid this, try to print in a well-lit, climate-controlled room that is free from dust and other contaminants.

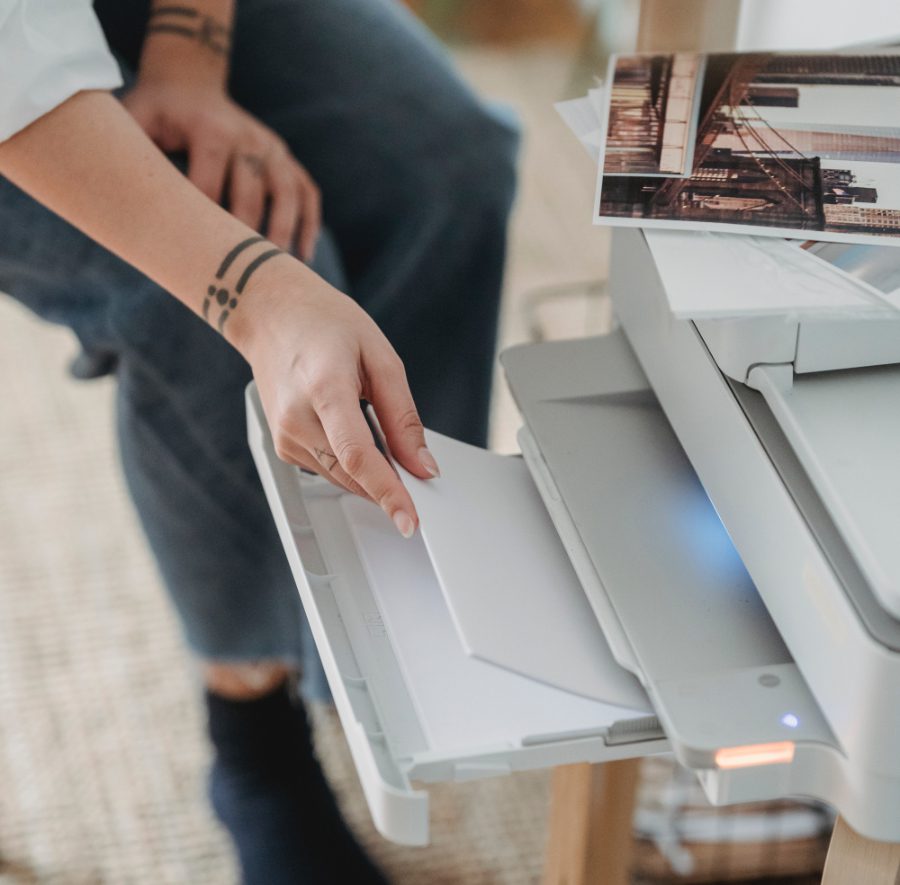
How to Export Photos for Print
Exporting photos for print can be a bit tricky, but with the right knowledge and tools, you can ensure that your images come out looking their best. It’s important to understand that printing requires a higher resolution than digital display, so your photos may need some adjustments before exporting.
Here’s how to export photos for print:
1. Start by choosing the correct format. Most printers require JPEG or TIFF files, so make sure to save your images in one of these formats.
2. Adjust the resolution. For printing, you’ll need a resolution of at least 300 pixels per inch (ppi). This ensures that your images will be sharp and clear when printed. You can adjust the resolution in your editing software, such as Photoshop or Lightroom.
3. Check the color space. Printers use a different color space than digital displays, so it’s important to make sure that your images are in the correct color space. The most common color space for printing is CMYK, which stands for cyan, magenta, yellow, and black. You can convert your images to CMYK in your editing software.
4. Crop and resize. Make sure that your images are the correct size for printing. You may need to crop or resize your images to fit the paper size that you are printing on.
5. Save and export. When you’re finished editing your images, it’s time to save and export them for printing. Make sure to choose the correct file format, resolution, and color space. You can also choose to save your images as a PDF document, which can be easier to print.
Resampling
In the world of digital photography and graphic design, resampling is a technique that is used to adjust the resolution of an image.
One of the key benefits of resampling is that it allows you to print larger without sacrificing image quality. This is particularly useful when working with low-resolution images that need to be printed at a larger size than their original dimensions.
Resampling works by adding or removing pixels from an image, which can cause some loss of detail or sharpness. However, modern resampling algorithms are highly sophisticated and can minimize these effects. When used correctly, resampling can help you achieve high-quality prints that are sharp, clear, and visually appealing.
To use resampling effectively, it’s important to understand the basics of resolution and pixel density. Resolution refers to the number of pixels in an image, while pixel density refers to the number of pixels per inch (PPI). When you resample an image, you are essentially adjusting its resolution and pixel density to suit your needs.
This can be done in a variety of ways, including using software like Adobe Photoshop or Lightroom.
How to Resample a Photo in Photoshop?
Firstly, open your image in Photoshop and go to the “Image” menu. Click on “Image Size” to open the Image Size dialog box. In this dialog box, you’ll see the current size and resolution of your image.
If you want to increase or decrease the size of your image, you need to adjust the values in the “Width” and “Height” fields. Make sure that the “Constrain Proportions” option is checked to maintain the aspect ratio of your image.
Next, you’ll need to choose the resampling method. Photoshop offers three resampling methods, including “Nearest Neighbor,” “Bilinear,” and “Bicubic.”
Nearest Neighbor is the fastest resampling method, but it can produce jagged edges and pixelated images. Bilinear is a bit slower but produces smoother results than Nearest Neighbor. Bicubic is the slowest but produces the highest quality results.
After choosing the resampling method, you’ll need to enter the new resolution value in the “Resolution” field. The resolution value determines the number of pixels per inch in your image. For printing, you’ll need a resolution of at least 300 pixels per inch, while for web display, a resolution of 72 pixels per inch is sufficient.
Once you’ve made all the necessary adjustments, click on “OK” to apply the changes. Photoshop will resample your image according to the settings you’ve chosen. Keep in mind that resampling can affect the quality of your image, so it’s important to choose the appropriate resampling method and resolution value to get the best results.
What Export is Best for Printing Photos?
When it comes to printing photos, choosing the right export format is crucial to achieving a high-quality final product.
TIFF
TIFF, or Tagged Image File Format, is a lossless format that produces uncompressed files, resulting in high-quality images with no loss of detail or quality. This makes it an ideal format for printing photos, as it preserves the original image quality and ensures that the final product looks as good as the digital version.
Another advantage of TIFF is that it supports a wide range of color depths, including 8-bit, 16-bit, and even 32-bit. This means that photographers and graphic designers can work with high-resolution images and achieve better color accuracy, resulting in prints that are vibrant and true to life.
TIFF files can be saved in both RGB and CMYK color modes, making them suitable for both digital and print applications.
JPEG/PNG
JPEG files are the most commonly used file type for digital images. They are compressed, which means they take up less space on your device, but this compression can also lead to a loss of image quality.
When it comes to printing photos, it’s important to keep in mind that JPEGs can only be compressed so much before the image starts to pixelate. This can result in a loss of detail and sharpness in the final print.
PNG
PNG files are similar to JPEGs in that they are compressed, but they use a different type of compression called lossless compression. This means that the image quality is not affected when the file is saved.
PNGs are often used for web graphics and digital images, but they can also be used for printing photos. However, they are not as widely supported as TIFF files, so it’s important to make sure that your printer or editing software can handle them before using them for printing.
What is The Best File Size for Printing Photos?
For most printing purposes, a resolution of 300 pixels per inch (PPI) is recommended. This means that for a 4×6 inch print, the image should have a minimum resolution of 1200×1800 pixels, while an 8×10 inch print should have a resolution of at least 2400×3000 pixels.
However, if you’re printing a larger image or using a printing method that requires higher resolution, such as a professional-grade printer or a large format print, you may need a higher file size. In such cases, it’s recommended to have an image resolution of 600 ppi or higher.
In conclusion, a high-resolution file size of at least 300 DPI is recommended for large prints, while a lower resolution of around 150 DPI may be sufficient for smaller prints. It is also important to ensure that the chosen file size is compatible with the printer being used to avoid any printing issues or quality loss. By taking these factors into account, photographers can ensure that their photos are printed with the best possible quality and clarity.